


Access Request
This section explains how to request access in Anugal in a simple and structured way.
Open Anugal in your browser and log in using the configured Authenticator.
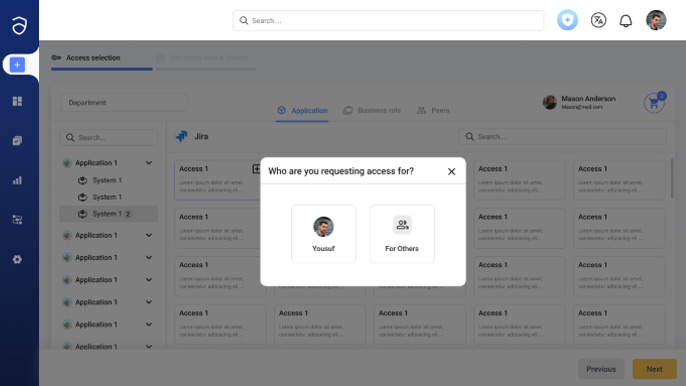
In the home screen, click the ‘+’ button from the menu bar and select Access Request.
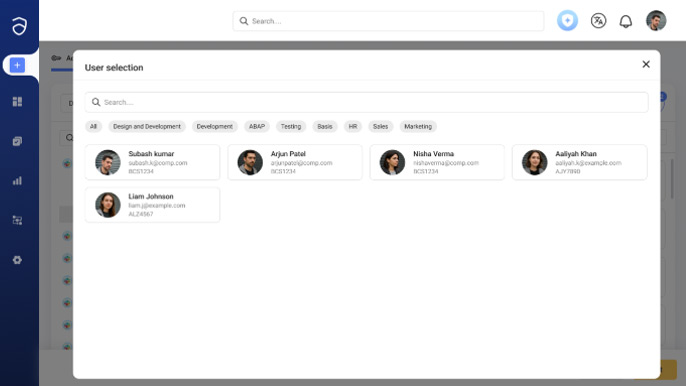
You can either request access for yourself or for your peers. Choose the profile and you can find the list of available applications on the next page.
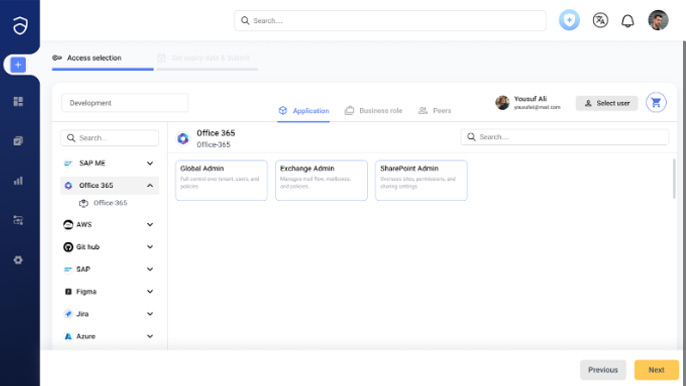
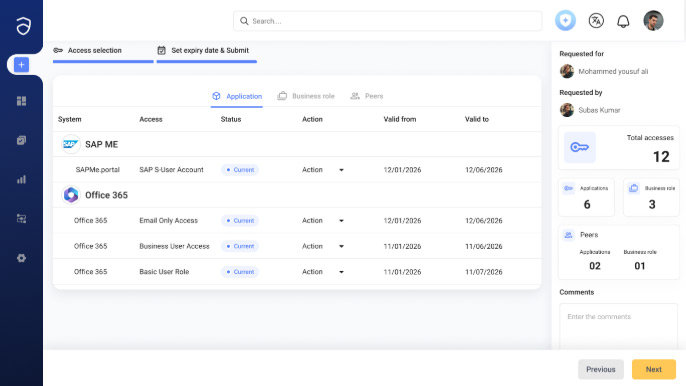
Select the application and system you want access to.
Example:SAP, Office 365, etc
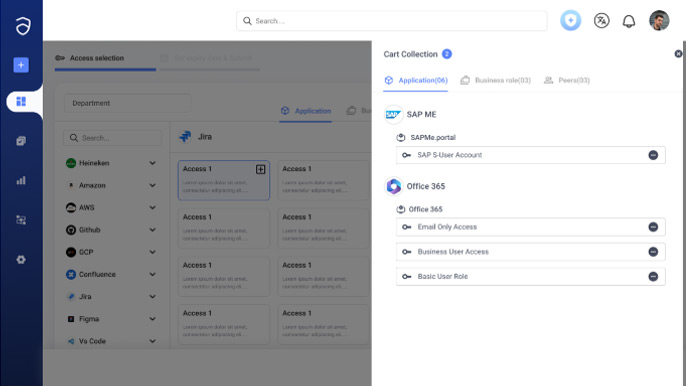
You can view all the selected roles in your cart.
View the summary and enter your comments for the request.
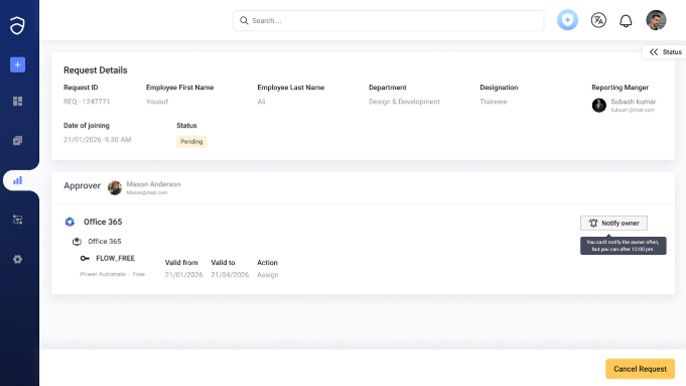
Click Submit to send your access request for approval. A request ID will be generated, and you can view your requests in the Status page.
Your request automatically goes to the appropriate approver as per the configuration:
Please check the Approval flow in this section.
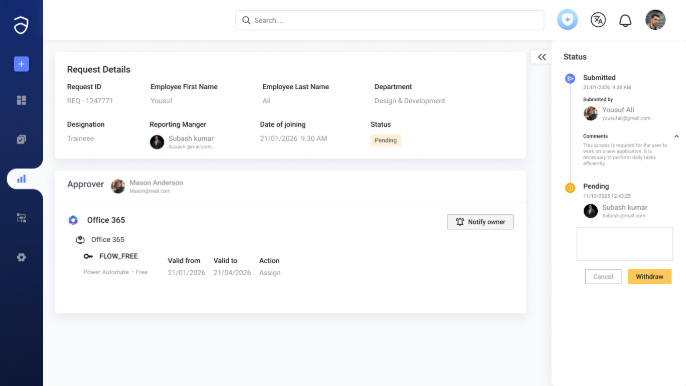
You can check your request status from the Status page:
You can also notify the owner for approval using the Notify Owner button.
You can also Withdraw a pending request by entering the reason in the textbox.
Once approved, access is automatically provisioned to the target system.
You will receive an email notification when access is granted.